
Quick Answer:
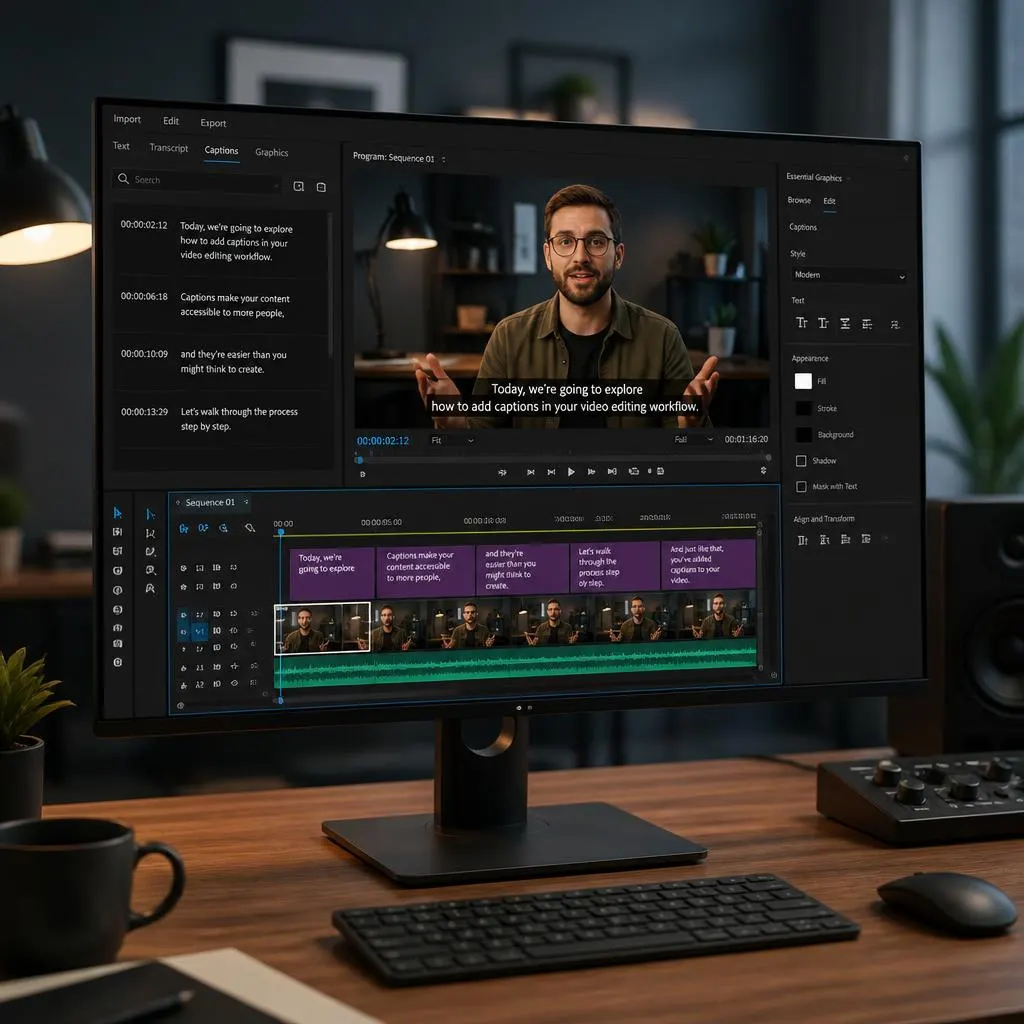
To add captions in Adobe Premiere Pro, open your video in the timeline, go to the Text panel, and use the Transcribe Sequence feature to generate a transcript from the dialogue. Review the transcript, then select Create Captions to turn it into timed subtitles. You can customize the caption style, font, color, and position to match your video. Before exporting, check the timing and spelling to ensure your captions are accurate, readable, and ready for YouTube, social media, or other platforms.
Adding captions in Adobe Premiere Pro makes your videos easier to follow, more accessible, and more convenient to watch with the sound turned off. Whether you create YouTube videos, Instagram Reels, tutorials, interviews, or short films, captions help viewers understand what people say without relying entirely on audio.
The good news is that you do not need to type every sentence manually. Premiere Pro offers speech to text tools that can generate a transcript and turn it into timed captions. You can then correct mistakes, customize the caption style, adjust placement, and export your finished video.
In this guide, you will learn how to add captions in Premiere Pro automatically and manually, edit their appearance, import existing subtitle files, fix common problems, and export captions correctly for different platforms.
How to Add Captions in Premiere Pro
The quickest way to add captions in Premiere Pro is to use its automatic transcription workflow.
- Import your video and place it on the timeline.
- Open the Text panel.
- Generate a transcript using Speech to Text, if available in your version.
- Create captions from the transcript.
- Correct spelling, punctuation, and transcription errors.
- Customize the font, size, color, background, and position.
- Export your video with burned in captions or export a separate caption file when supported.
For social media videos, burned in captions are often convenient because they remain visible in the video. For platforms that support selectable subtitles, a separate caption file can give viewers more control over how they watch.
What Are Captions in Premiere Pro?
Captions display spoken dialogue as text on the screen while a video plays. They can also include relevant non speech audio information, such as a door slamming or music playing, when that information helps viewers understand the content.
Premiere Pro supports caption workflows that let you generate, edit, style, and export text synchronized with your video. The exact controls and menu names can differ between versions.
It helps to understand the difference between captions and subtitles before you begin.
- Captions: Often include dialogue and relevant sound information, supporting viewers who are deaf or hard of hearing.
- Subtitles: Usually focus on spoken dialogue, particularly when translating a video into another language.
- Burned in captions: Become part of the video picture and cannot be switched off independently.
- Sidecar captions: Are stored separately from the video in a supported file format, allowing compatible players to display them independently.
For a typical social media video, burned in captions are a practical choice. For a longer video published on a platform that supports subtitle files, a separate caption track may be more flexible.
How to Add Captions in Premiere Pro Automatica
Automatic transcription is usually the easiest approach when your video contains clear spoken dialogue. Premiere Pro analyzes the audio, generates a transcript, and lets you convert the text into timed captions.
Step 1: Import Your Video
Open Adobe Premiere Pro and create a new project or open an existing one.
Import your video through the Import option or drag the video file into the Project panel. Next, drag the clip onto the timeline to create or populate your sequence.
Play a few seconds of the video and check that the correct audio track is active. If the dialogue is too quiet, distorted, or covered by loud background music, improve the audio before generating the transcript.
Step 2: Open the Text Panel
Open the Text panel from the Window menu if it is not already visible. Depending on your version, you may see options for Transcript, Captions, or both.
The Transcript workflow handles the text recognized from your audio. The Captions workflow lets you create and edit the timed text segments that appear in the video.
If your workspace looks different from a tutorial you are following, check your Premiere Pro version before assuming a feature is missing.
Step 3: Generate a Transcript
Select the transcription option in the Text panel. Choose the appropriate language for your video’s dialogue and review any available transcription settings.
Start the transcription process and wait for Premiere Pro to analyze the audio. The time required depends on the length of your video, your system, and the workflow available in your version.
For better results:
- Use clear audio with minimal background noise.
- Select the correct spoken language.
- Make sure the dialogue is not clipped or distorted.
- Check names, brand names, specialist vocabulary, and unusual pronunciations afterward.
Automatic transcription is a useful starting point, but it does not guarantee perfect wording.
Step 4: Create Captions From the Transcript
After Premiere Pro generates the transcript, look for the option to create captions from it.
Depending on your version, you may be able to choose caption formatting options such as maximum characters per line, the number of lines, and the duration of each caption.
Choose settings that keep the text readable without covering important parts of the picture. For ordinary dialogue, two lines are often easier to read than a long block of text.
Confirm your settings and generate the captions. Premiere Pro will create caption segments synchronized with the dialogue.
Step 5: Review the Captions on the Timeline
Look at the timeline and find the caption track. Each caption segment should correspond to a portion of dialogue.
Play the video from beginning to end, or review it section by section. Check whether each caption appears at the correct moment and disappears when the dialogue ends.
Pay special attention to:
- The first and last words of each sentence.
- Pauses between speakers.
- Interruptions and overlapping dialogue.
- Names and technical terms.
- Captions that appear too briefly to read.
- Long sentences that need better line breaks.
Correcting these details makes the final video feel much more polished.
How to Add Captions in Premiere Pro Manually
Automatic transcription is not always available or suitable. You may prefer manual captioning when your video contains music, very little dialogue, specialized terminology, or carefully scripted speech.
Step 1: Open the Captions Workspace
Open the Text panel and locate the caption creation controls supported by your version of Premiere Pro.
If you are starting from scratch, create a caption track or use the available caption workflow to begin adding timed text. The exact command can vary between releases.
Step 2: Add Your First Caption
Move the playhead to the point where the first spoken line begins. Create a caption segment and enter the words you want to display.
Keep the wording faithful to the speech. If you are creating accessibility captions, include relevant sound descriptions when needed to understand the scene.
Step 3: Set the Caption Duration
Adjust the beginning and end of the caption segment so that the text matches the spoken words.
A caption should appear close to the beginning of the relevant dialogue and remain on screen long enough to read comfortably. Avoid leaving an old caption visible after the speaker has moved on to another sentence.
Step 4: Add the Remaining Captions
Repeat the process for each section of dialogue. Use natural sentence breaks and avoid placing too much text on screen at once.
Manual captioning takes longer than automatic transcription, but it gives you precise control over wording, timing, and presentation.
Step 5: Watch the Video With Captions Enabled
Play the entire sequence and read along with the captions. Correct any timing errors, missing words, and awkward line breaks before exporting.
For longer videos, review the sequence in manageable sections so you do not overlook small mistakes.
How to Edit Captions in Premiere Pro
Once the captions exist, you can refine their wording and timing without recreating the entire track.
Correct Spelling and Transcription Errors
Select a caption in the Text panel or timeline and edit its text using the available caption editing controls.
Check spelling, punctuation, names, abbreviations, and numbers. Automatic transcription may also omit short words or misinterpret speech when several people talk at once.
Do not assume the generated transcript is accurate simply because the sentences look grammatically correct.
Adjust Caption Timing
If the words appear too early or too late, adjust the caption segment on the timeline or use the timing controls available in your version.
Make sure the caption starts close to the spoken phrase. If a speaker pauses naturally, use that pause to create a sensible break between captions.
Improve Line Breaks
Long lines are harder to read, especially on mobile screens. Break a sentence at a natural phrase boundary rather than dividing it in the middle of a name or expression.
For example, this caption is difficult to scan:
– Welcome back to the channel where we share simple video editing tips for beginners.
A more readable presentation is:
- Welcome back to the channel.
- We share simple video editing tips for beginners.
Use separate caption segments only when the timing and sentence structure support that division. Do not split every sentence automatically if it makes the dialogue feel fragmented.
How to Customize Caption Style in Premiere Pro
A good caption style should match your video while keeping every word easy to read. Premiere Pro provides caption formatting controls, although the available options depend on your version and the type of captions you create.
Change the Caption Font and Size
Select a caption segment and open the relevant caption formatting or Properties controls.
Choose a font that remains readable on a small screen. Simple sans serif fonts usually work well for tutorials, vlogs, interviews, and social media clips.
Use a font size that fits your video dimensions. Captions that look large in a desktop preview may appear too small on a phone, so check the result at a realistic viewing size.
Change Caption Color
White text is a common choice because it works across many types of video footage. However, white captions can disappear against bright backgrounds.
Consider these options:
- White text for a clean, classic look.
- Yellow text for a bold, high contrast style when paired with a suitable outline or background.
- Brand colors for videos that follow a consistent visual identity.
- Dark text on a light background when that combination offers better contrast.
Always prioritize readability over decoration.
Add a Background or Outline
A dark background behind light text can make captions easier to read over changing footage. An outline or shadow may also improve contrast.
Use the caption style controls available in your version. Some styling options may behave differently depending on whether you are working with a caption track, graphics, or text overlays.
Avoid heavy shadows, complicated backgrounds, and excessive decorative effects that compete with the video.
Position Captions Correctly
Captions commonly appear near the bottom of the frame, but they should not cover important visual information.
Keep captions away from faces, essential on screen text, logos, and platform interface elements. For vertical videos, leave extra space around the bottom and sides because social media apps may place buttons and descriptions over the picture.
Check the position on the actual target aspect ratio before exporting.
How to Add Captions to YouTube Videos in Premiere Pro
YouTube creators can use either burned in captions or a separate subtitle file, depending on the viewing experience they want.
Option 1: Burn Captions Into the Video
Use this approach if you want the captions to remain visible whenever someone watches the exported video.
- Create and edit the captions in Premiere Pro.
- Choose a readable font, size, and color.
- Check their position in the video frame.
- Open the Export workspace.
- Review the caption settings and select the option to burn captions into the video, if available.
- Export the video and watch the finished file to confirm that the captions appear correctly.
This method is convenient for videos that need visible captions without relying on the viewer to enable subtitles.
Option 2: Export a Separate Caption File
If you want viewers to turn subtitles on or off, check whether your Premiere Pro export settings support exporting a sidecar caption file.
A common format is SRT, which stores subtitle text alongside timing information. If your version or chosen workflow does not offer the required export option, use a compatible subtitle workflow to create the file.
You can then upload the supported subtitle file through YouTube Studio.
A separate file is especially useful when you plan to publish the same video in multiple languages.
How to Add Captions to Instagram Reels and TikTok Videos
Short form videos benefit from captions that are easy to scan quickly. Many viewers watch clips with their phones muted, so clear on screen text can help them follow the message.
When preparing captions in Premiere Pro:
- Use short phrases rather than large blocks of text.
- Keep the text inside the visible safe area.
- Avoid placing captions over faces or important actions.
- Use strong contrast between the text and background.
- Preview the video in a vertical format before exporting.
- Check that captions do not overlap platform buttons or account information.
For a more dynamic editing style, you can create separate text overlays that emphasize selected words. However, animated text overlays are different from a conventional caption track and may require additional editing.
If you need captions that change color word by word or highlight each spoken word, check the capabilities of your Premiere Pro version or consider a compatible captioning workflow.
How to Import an Existing SRT Subtitle File
If you already have captions in an SRT file, you may not need to generate a transcript again.
An SRT file contains subtitle text with start and end times. Premiere Pro versions and workflows differ in how they handle subtitle imports, so verify that your file format is supported.
Step 1: Prepare the SRT File
Make sure the file contains the correct dialogue and timing. Open it in a text editor if you need to check its contents.
A simple SRT entry looks like this:
1
00:00:01,000 --> 00:00:03,500
Welcome to this video editing tutorial.

2
00:00:03,600 --> 00:00:06,000
Today, we will add captions in Premiere Pro.
Each entry contains a sequence number, start and end times, and the subtitle text.
Step 2: Import the File
Use Premiere Pro’s supported import workflow for subtitle or caption files. If your version supports direct SRT import, import the file and place the resulting captions in the sequence as required.
If the import option is unavailable, check your version’s documentation or use a compatible conversion or subtitle workflow.
Step 3: Check Synchronization
Play the video and compare the captions with the spoken dialogue.
A file may contain correct text but still be out of sync if the video has been trimmed or edited since the subtitle file was created.
Correct any timing differences before exporting.
How to Export a Video With Captions in Premiere Pro
Exporting is the final step, and choosing the correct caption option matters. The best setting depends on whether you want permanent on screen captions or a separate subtitle track.
Export With Burned In Captions
Choose burned in captions when you want the text to become part of the exported picture.
- Finish editing your sequence and captions.
- Open the Export workspace.
- Select your preferred video format and export settings.
- Find the caption options in the export settings.
- Select the available option to burn captions into the video.
- Export the file and review the result.
The caption text should remain visible when you play the exported video in a standard player.
Export Captions as a Separate File
Choose a sidecar file when you need a separate subtitle track for a compatible platform or player.
- Open the export settings.
- Find the caption export controls.
- Select a supported sidecar format, such as SRT, if available.
- Export the caption file.
- Upload it alongside the video or add it to a compatible player.
A sidecar file is not the same as a video file with permanent captions. The player or platform must support the subtitle format and load the file correctly.
Check the Exported Video Before Publishing
Always watch the exported file, not just the Premiere Pro preview.
Confirm that:
- The first caption appears at the correct time.
- The last caption does not disappear too early.
- Text is not cut off at the edges.
- Font size remains readable.
- Captions do not cover essential visuals.
- Punctuation and spelling are correct.
- The video plays smoothly with synchronized audio.
These checks help you catch errors before uploading the finished video.
Common Caption Problems in Premiere Pro and How to Fix Them
Even a straightforward caption workflow can produce errors. Here are common issues and practical ways to solve them.
Premiere Pro Is Not Generating Captions
First, confirm that you have selected the correct sequence and audio source. Check that the dialogue is audible and that you have chosen the correct language.
If the transcription feature is unavailable, check your Premiere Pro version, current workspace, and the requirements of the workflow you are using.
Restarting the application or checking for updates may help with a temporary software issue, but do not assume an update will resolve every problem.
Automatic Captions Contain Incorrect Words
Speech recognition can struggle with accents, names, technical language, overlapping speakers, and background noise.
Listen to the audio while reading the transcript. Correct each error manually instead of relying entirely on the automatic result.
If transcription accuracy is poor throughout the video, improve the audio quality or consider manual captioning.
Captions Are Out of Sync
Check the caption segment’s start and end times against the dialogue. If the video was trimmed after the captions were generated, some segments may need adjustment.
For imported SRT files, verify that the subtitle timings match the current version of the video.
Captions Are Too Small
Increase the text size using the relevant formatting controls. Preview the video on a smaller display to check readability.
Avoid making the text so large that it hides faces or important parts of the picture.
Captions Are Cut Off
Move the captions farther inside the video frame and review the export dimensions. Text can become cropped when a project is resized or converted to another aspect ratio.
Check the final file at its actual resolution rather than relying solely on the editing preview.
Captions Do Not Appear After Export
Reopen the export settings and check which caption output option you selected.
If you exported a separate SRT file, the captions will not automatically appear in every video player. You may need to load the file separately or upload it to a compatible platform.
If you want captions permanently visible, use the burned in option supported by your export workflow.
The Caption Background Looks Different After Export
Review the selected caption styling options and compare the final export with the preview. Backgrounds, outlines, and other styling may render differently depending on the caption type and output workflow.
Test a short export before processing a long video if appearance is particularly important.
Tips for Creating Professional Captions in Premiere Pro
Good captions do more than display dialogue. They make a video easier to understand without distracting viewers from the content.
Keep Each Caption Easy to Read
Use natural phrase breaks and avoid cramming too many words into a single caption. Viewers should have enough time to read the text while watching the action.
Follow the Speaker’s Meaning
Do not change the meaning of a sentence just to make a caption shorter. Remove unnecessary repetition only when your captioning approach permits it and the intended meaning remains clear.
For accessibility focused captions, preserve meaningful speech and include relevant non speech audio information.
Use Consistent Formatting
Choose a readable font, color, and placement, then use them consistently throughout the video.
If your video uses multiple speakers, you can use other appropriate cues to distinguish speakers, provided the result remains clear and accessible.
Check Captions on Different Screens
A caption style that looks good on a laptop may be difficult to read on a phone. Preview the video at its intended aspect ratio and resolution.
This is particularly important for vertical videos, where screen space is limited.
Proofread Every Caption
Correct spelling, punctuation, names, and technical vocabulary. Even a small transcription error can change the meaning of a sentence.
Do not publish an automatically generated transcript without reviewing it.
How to Choose the Right Caption Method
The best method depends on your project, the amount of dialogue, and where you intend to publish the video.
- Automatic transcription: Best for interviews, tutorials, vlogs, and videos with clear dialogue.
- Manual captions: Best when exact wording, precise timing, or specialist vocabulary matters.
- Imported SRT files: Best when captions already exist and the file is compatible with your Premiere Pro workflow.
- Burned in captions: Best when text must remain visible in the exported video.
- Separate caption files: Best when you want compatible platforms and players to control subtitle display.
For most beginners, automatic transcription followed by manual correction is a sensible starting point. It saves time without sacrificing the accuracy and readability viewers expect.
FAQs
1. Can Premiere Pro automatically generate captions?
Yes. Premiere Pro includes speech to text and caption creation features in supported versions. You can generate a transcript, create timed captions, and edit the results. You should always check the transcript for mistakes.
2. How do I add captions in Premiere Pro for free?
If you already have access to a Premiere Pro version that includes the captioning tools, you can use those features within your existing software access. Premiere Pro itself is generally paid software, so access to its tools depends on your license or subscription.
3. Can I add captions manually in Premiere Pro?
Yes. You can create caption segments, enter text, adjust timing, and review each line. Manual captioning is useful when automatic transcription is unavailable or produces too many errors.
4. What is the difference between captions and subtitles?
Captions commonly include dialogue and relevant sound information for accessibility. Subtitles usually focus on spoken words and may translate them into another language. In everyday use, people sometimes use the terms interchangeably.
5. How do I change caption font size in Premiere Pro?
Select the caption and open the relevant caption formatting or Properties controls. Adjust the font size and preview the result. The exact controls depend on your Premiere Pro version and the type of text you are editing.
6. Can I add captions to a vertical video in Premiere Pro?
Yes. You can create captions in a vertical sequence and adjust their size and position for mobile viewing. Keep them away from important visual details and the areas where social media interfaces may appear.
7. Can I export captions separately from my video?
Premiere Pro supports caption export workflows that depend on the version and export settings. If a supported sidecar format such as SRT is available, you can export a separate subtitle file rather than burning the text into the picture.
8. Why are my Premiere Pro captions out of sync?
Captions may become out of sync after trimming the video, changing clip timing, or importing a subtitle file made for another edit. Compare the caption timing with the audio and adjust the affected segments.
9. Can I edit captions after generating them automatically?
Yes. You can correct the wording, punctuation, timing, and line breaks. Automatic transcription should be treated as a starting point rather than a finished accessibility review.
10. How do I make captions appear permanently in a video?
Select the burned in caption option in the supported export workflow. This places the text directly into the exported video picture, so viewers cannot turn it off independently.
11. Can I add captions to a movie in Premiere Pro?
Yes. You can caption a short clip, a full length movie, or another video project. Longer projects need careful proofreading and timing checks to maintain consistency.
12. Are burned in captions better than SRT subtitles?
Neither option is best for every situation. Burned in captions are useful when you want text to remain visible everywhere the video plays. SRT subtitles are useful when a compatible platform or player should let viewers turn subtitles on or off.
Conclusion
Learning how to add captions in Premiere Pro becomes much easier once you understand the basic workflow. Generate a transcript when automatic speech recognition is suitable, create captions, correct the text, refine the timing, and choose a readable style.
Before publishing, review the entire video and confirm that your export settings match your needs. With accurate wording, sensible timing, and clear formatting, you can produce captions that improve the viewing experience across YouTube, social media, tutorials, interviews, and other video projects.